
Project: Beholder
A labor of love.
As a kid, one of my fondest memories was playing “Dungeons and Dragons” with my grandfather. He happily ran games for my nerdy gang of friends all summer long, every Thursday night. Punctuated with rolls of the dice, he told us epic tales of goblins, centaurs, and dragons. No villain was longer running and more nefarious than the Beholders that seemed to plague us from the start of our adventures. As a tribute to those fond memories and countless hours of stories, the Beholder monster has held my imagination captive for years.
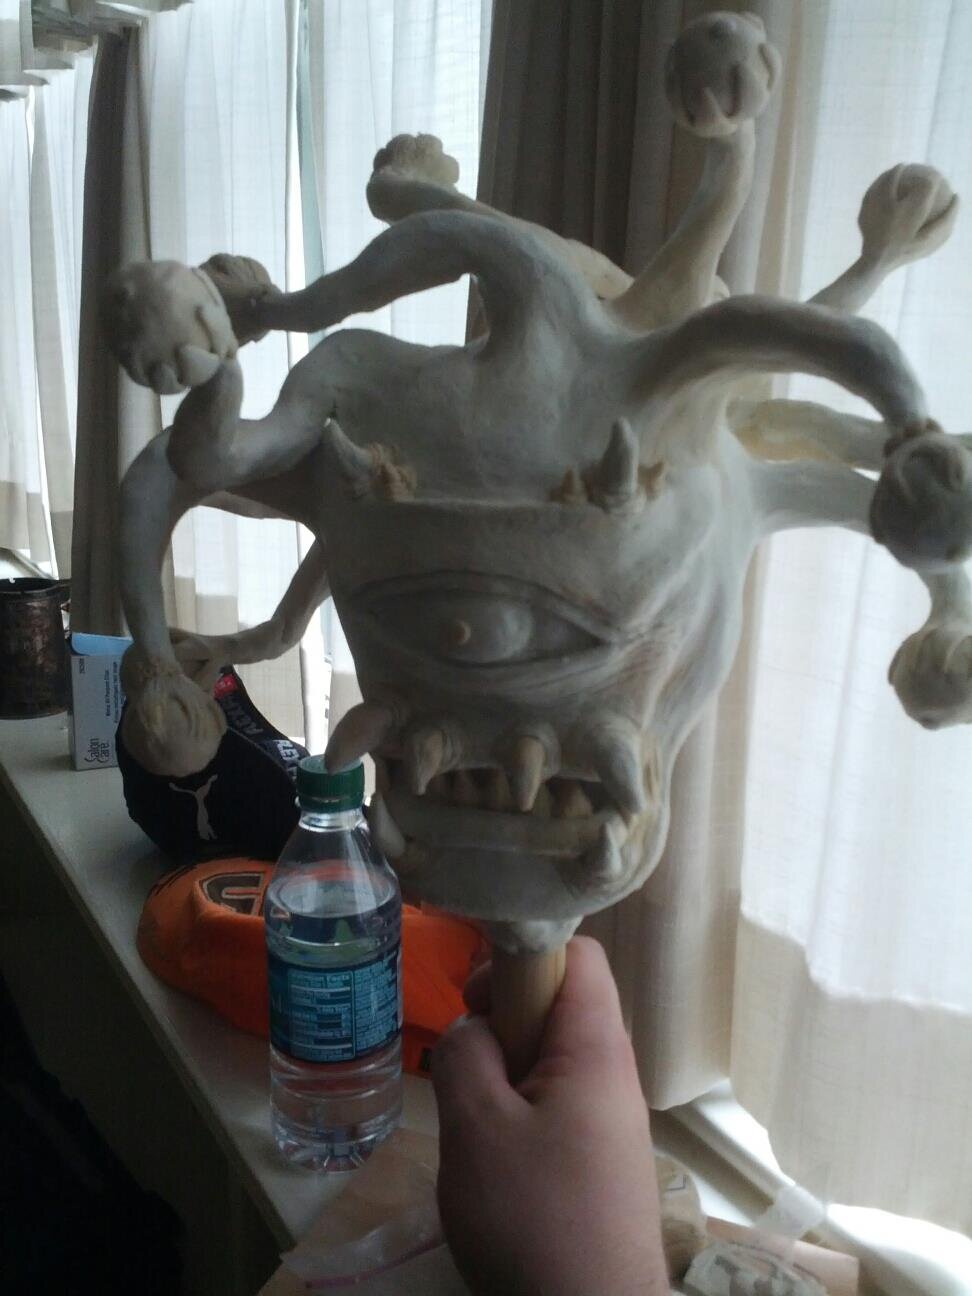
The first Maquette. 2007
The first chance I had to approach the Beholder as a puppet concept came in 2008. A small production company in Missouri running an event for Amtgard contacting me to build a “large and challenging end of event monster puppet. Something that can mostly be used in the dark to scare and shock our players with.”
Realizing I had an opportunity to create a full sized Beholder puppet, I pitched the concept: full sculpted, latex, aluminum frame, and cable controls. The production company loved the idea, and then promptly shut it down. They only had a few thousand dollars and needed a large host of low cost costumes and this puppet.

Our end result was possibly my worst work in the last twelve years. Using the puppet in the dark and creatively using lighting effects saved the day. The customers loved it and raved about how scary it was.
This is the only surviving image after it the puppet had been operating for about twenty straight hours. The mechanics had all broken at this point.
It was at this point that I realized if I wanted to build this puppet the right way,
I would need a better plan of attack and much more money.

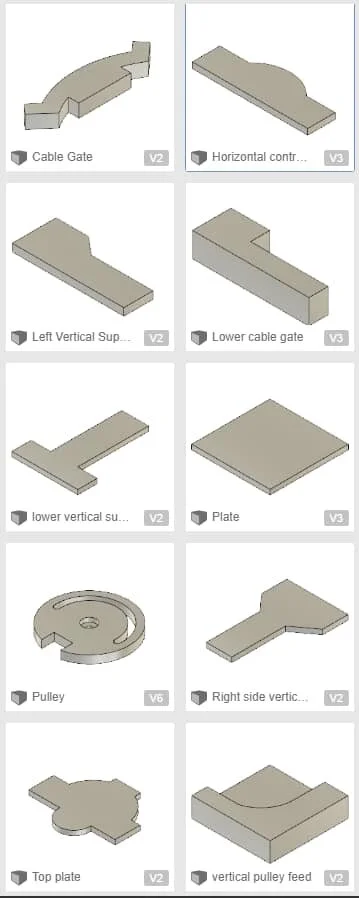


The first step was redesigning the mechanisms that moved the eye stalks. I had used a tension-flex device before but wanted more control, and the obvious choice for me was cable control. After taking the Stan Winston School cable control course, I decided my first step was to design and start building the controllers. I attempted to design one out of paper, proofed it in foam, and tried to translate my designs to a friend that had some Fusion 360 skills and a hobby CNC machine.
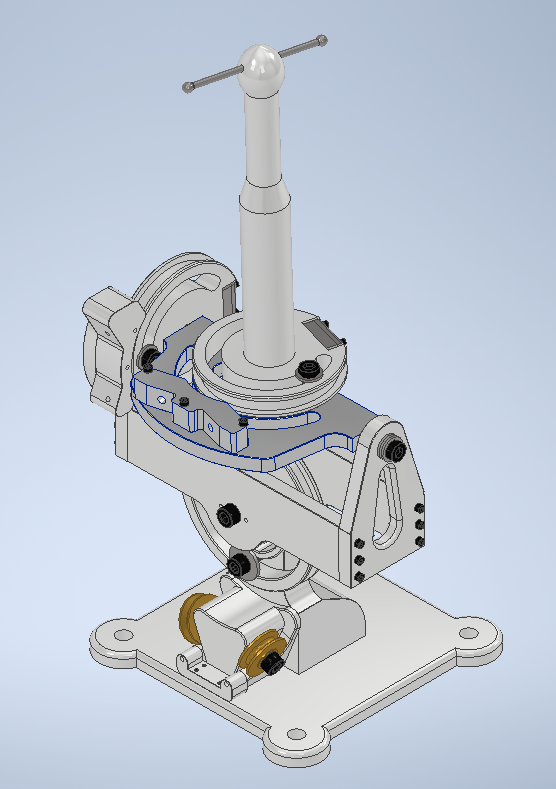
After welding multiple end mills to the aluminum on the hobby CNC machine, I decided to scrap that plan and try again. This time, I learned Autodesk Inventor through school I completely redesigned the controller myself. My intention was to buy my own small vertical mill, and manufacture the controller myself. Before I had the chance to finish I was offered an opportunity to explore a certification in Fusion 360 generative design. I knew as soon as I began using the software that my controller would be a perfect use of the software’s ability to create lighter and stronger parts.
This piece of the project is still in progress but will feature an additive manufacturing techniques.

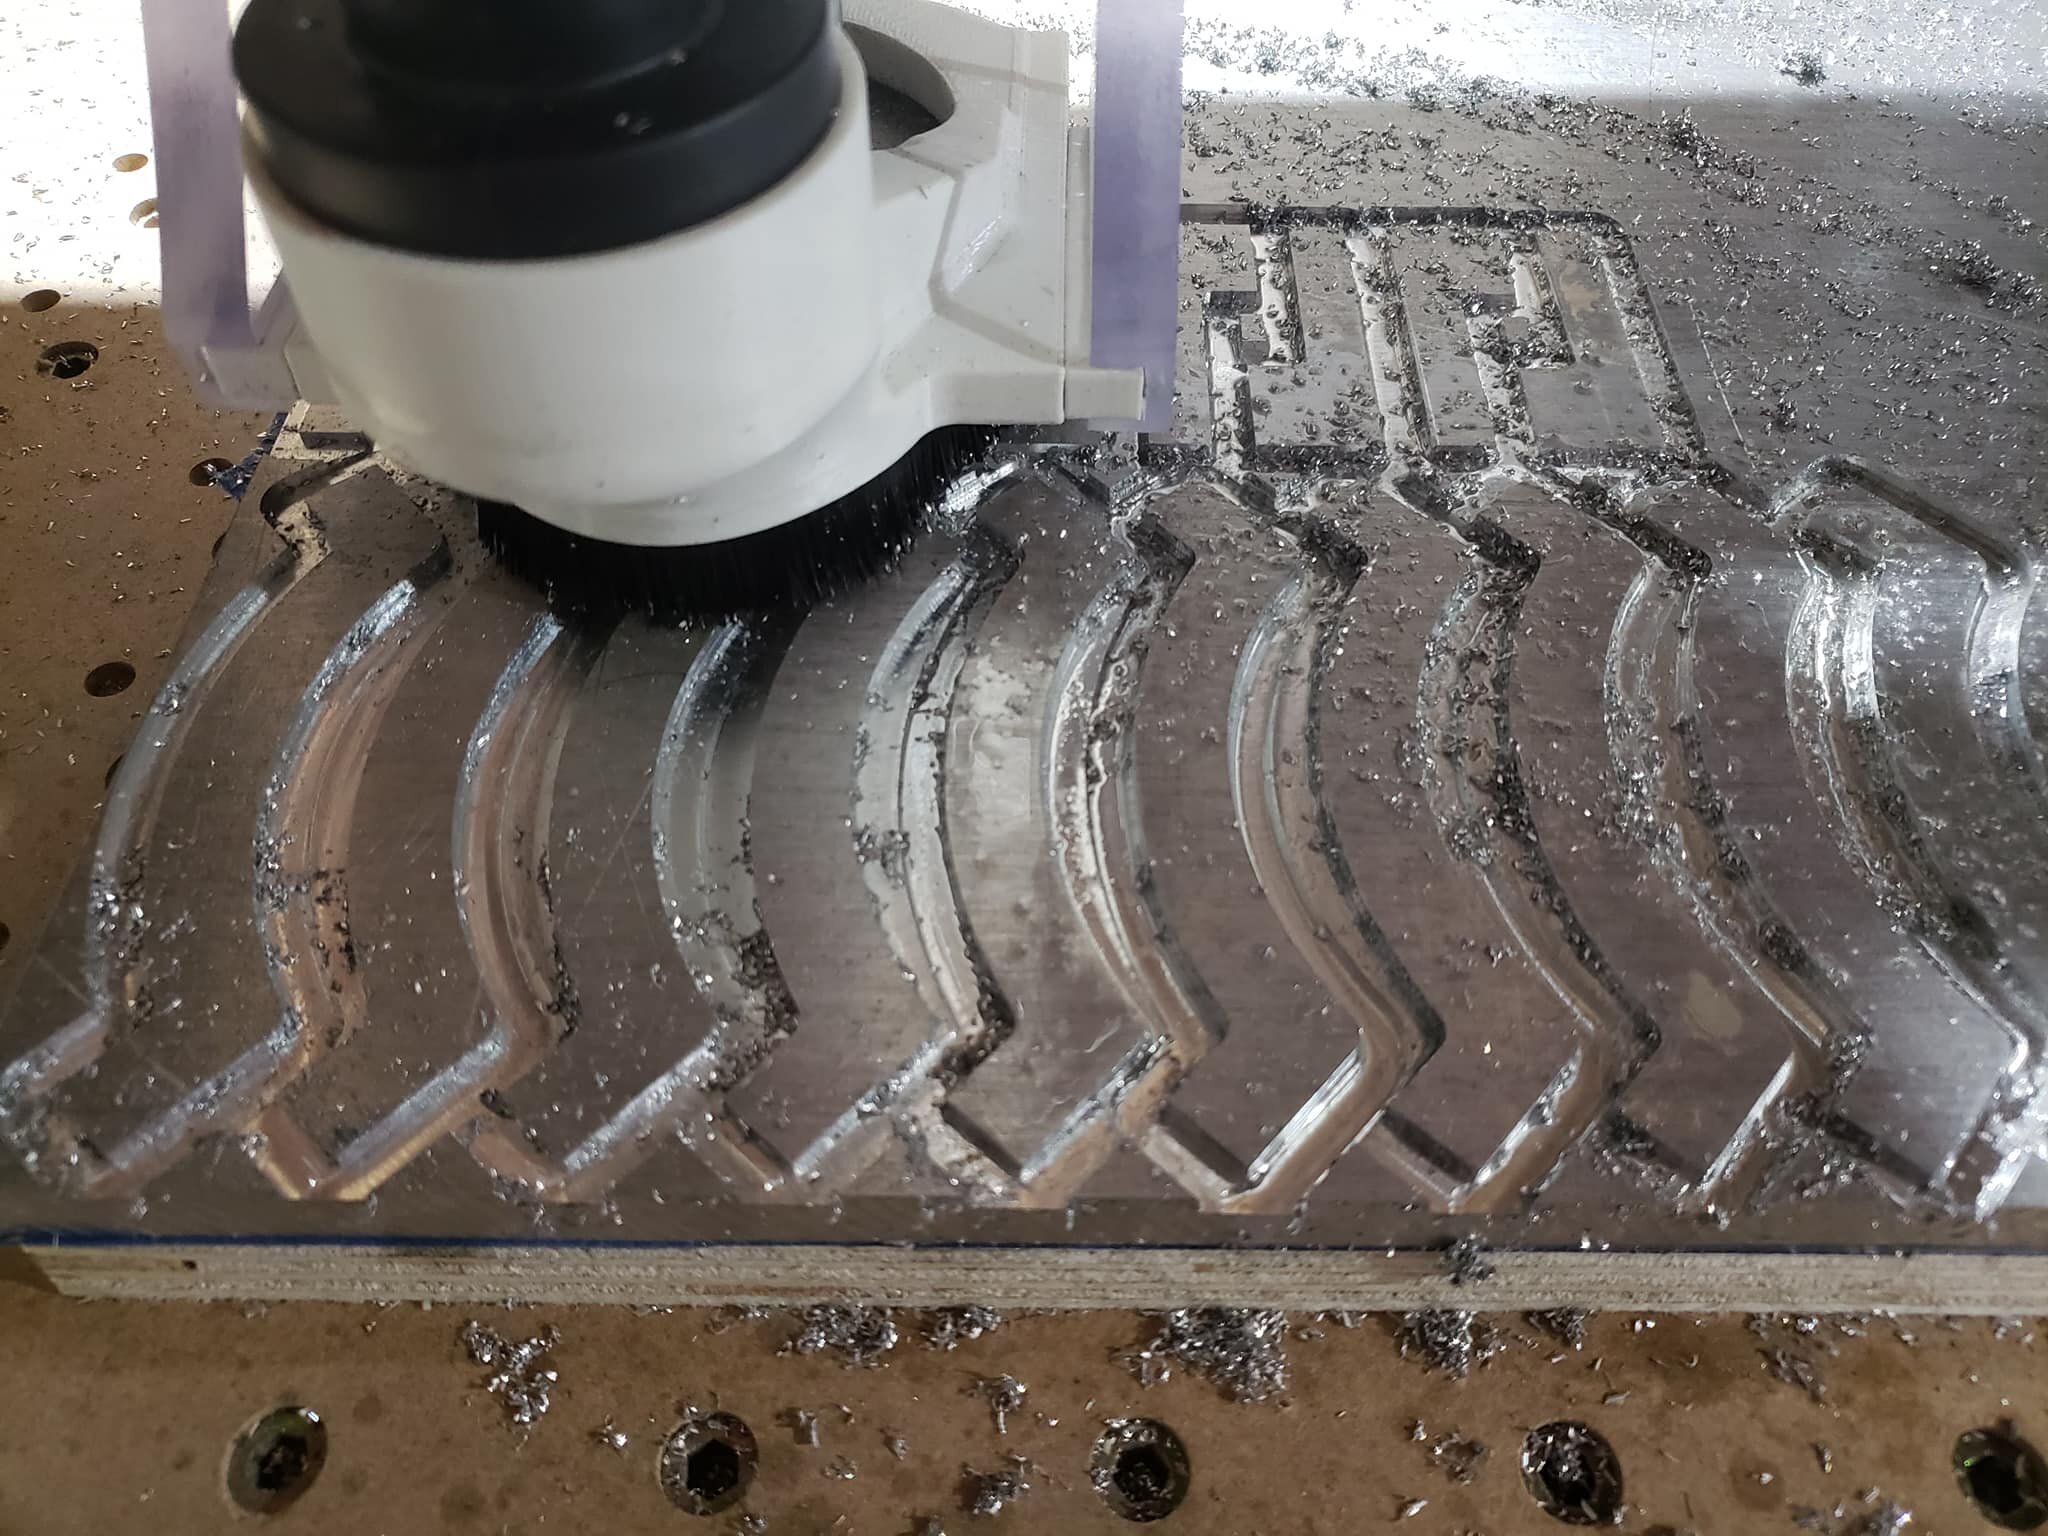
Creation of the cable control mechanisms was a tedious process with extremely inaccurate tools. Repeatably was low, but the end pieces were usable. Made of 6061 aluminum.


The internal framework and skin of the beholder also needed to be upgraded. As I was doing this out of my own pocket, I opted for 2011 aluminum. The new skin is a much more durable .5” 4# XLPE. Eventually, this frame will be TIG welded.

An industry contact heard I was building the puppet and asked if it would be ready to test at their upcoming 900-person event. All finishing assembly and sculptural foam elements were completed on site. A bonus of doing the work on-site allowed me to host a hands-on class about foam fabrication, with the students helping with final detail carving and assembly.
For size reference, the woman in this photo is 5’6” tall.


In hard testing, the puppet proved to be highly mobile. We ran it with the eye stalks static and the eye locked as we did not have any completed controllers to hook up the cables. The crew was kind enough to turn on a few lights so we could get pictures in between encounters with customers.
Where does it go from here?

The next steps in the build will be to rig up the cable controlled eye stalks using aviation cabling and stainless steel lined cable guide. I will also continue on with skin detailing and surface coating. While we tested this puppet in the dark, the end goal is to have stage ready puppet.
